
Cross another one off of our list! We've finished one more (big) project as we transform this house from seventies rad to a more contemporary form of radness...
The master bathroom has been redone. And for those of you who favor potential mildew, I'm sorry to say, we pulled the carpet (and virtually everything else) out of the bathroom.

 Check out this amazing retro wallpaper we found during demo.


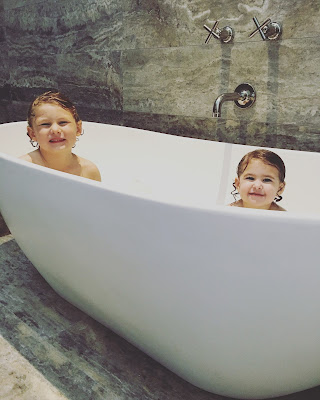
 The kids prefer to refer to that tub as their slide...


Other house updates here, here, and here.
The master bathroom has been redone. And for those of you who favor potential mildew, I'm sorry to say, we pulled the carpet (and virtually everything else) out of the bathroom.
 Check out this amazing retro wallpaper we found during demo.
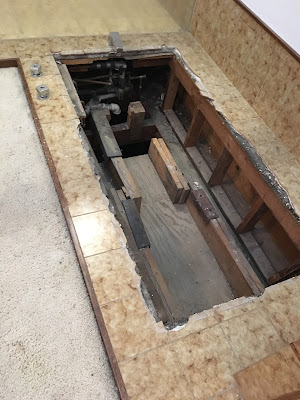
We said good bye to the sunken tub, which was beloved by the previous owners and completely hip and fashion-forward back in its day...
 The kids prefer to refer to that tub as their slide...
Don't mind the mess...

I was all over the place on tile/slab selection because I wanted materials that were gray, but also had warmth that incorporated the wood elements in the bathroom. The overall goal was to take out a lot of the wood and brown elements out of the space, but still embrace the existing wooden beams and architecture and make the home great shine again.

PS I LOVE going to stone/slab yards. I will go with anybody who asks me, so let me know if you need a field trip. The natural stones are just so gorgeous.
I went with a silver vein travertine slab and tile.
When the tile arrived, my objective was to line up the veining on the stone pieces. It was a tad overwhelming because there was a drastic variation in color and veining between each piece. But after laying out a random sampling on the garage floor, I realized it was time to dig in and start sorting the hundreds of (heavy) pieces into categories. This patchwork effect just wasn't going to cut it...

My tile installer might have wanted to kill me in the process because I literally numbered and handed over every single piece of tile. But...I would say the effort was worth it for the result. I love the ombre effect of the shower wall where it goes from dark on the bottom to light at the top. And I love the natural horizontal lines that we were able to find. It was one giant puzzle (and super fun). Shout out to those friends who stopped by and made method out of my puzzle madness during that week.


Okay, time for some before and afters...
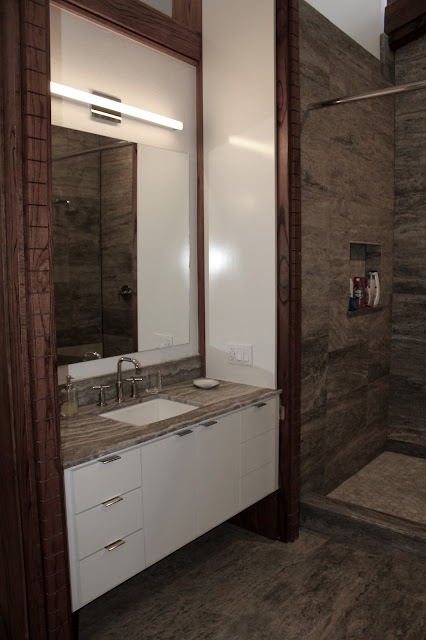
BEFORE: Rick's vanity area.


AFTER:

I love how we were able to keep the wooden elements, but take down the heavy wooden vanity and large vertical wooden panels and replace them with lighter pops of white.


BEFORE: shower and tub

AFTER:


The kids think the new tub is just too much fun. (Honestly, so do I!)

BEFORE: closet and my vanity

AFTER:

We also painted and added new carpet and light fixtures to the closet. 
BEFORE: my vanity

AFTER:


This was such a fun project...and makes me ready to tackle a kitchen soon.
-Bethany

No comments:
Post a Comment